Detailed Recipe and Tips
If you’re looking for a quick, no-bake dessert that’s both easy to make and customizable, these no-bake cheesecake jars are perfect! With just a few ingredients, you can whip up a creamy, delicious treat in about 30 minutes. This recipe is great for when you’re short on time or don’t want to turn on the oven. The best part? You can easily personalize the flavors and toppings to fit any occasion, whether it’s a party, BBQ, baby shower, or any other event!
Why This Recipe is a Must-Try
There are several reasons why these no-bake cheesecake jars are a fan favorite:
- Quick & Easy: You’ll need just 30 minutes to prepare everything.
- No Oven Required: Perfect for hot days when you want to avoid heating the kitchen.
- Simple Ingredients: Most of the ingredients are probably already in your pantry.
- Customizable: Choose from a variety of flavors and toppings to create your perfect cheesecake jar.
- Portable: Mason jars make this dessert easy to transport to any gathering.
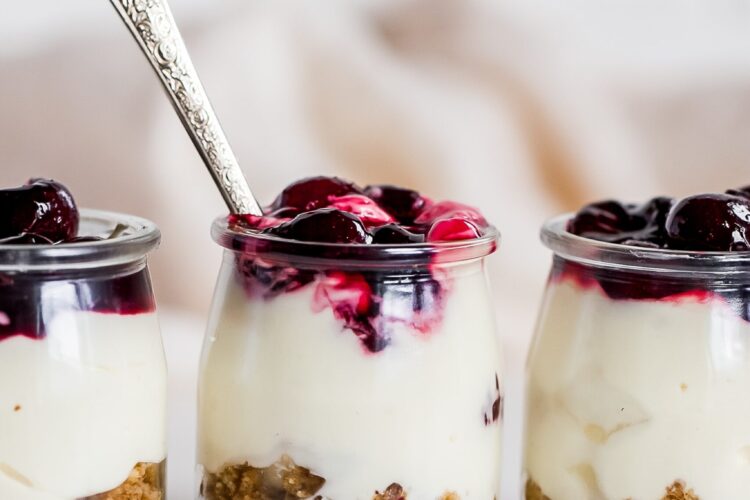
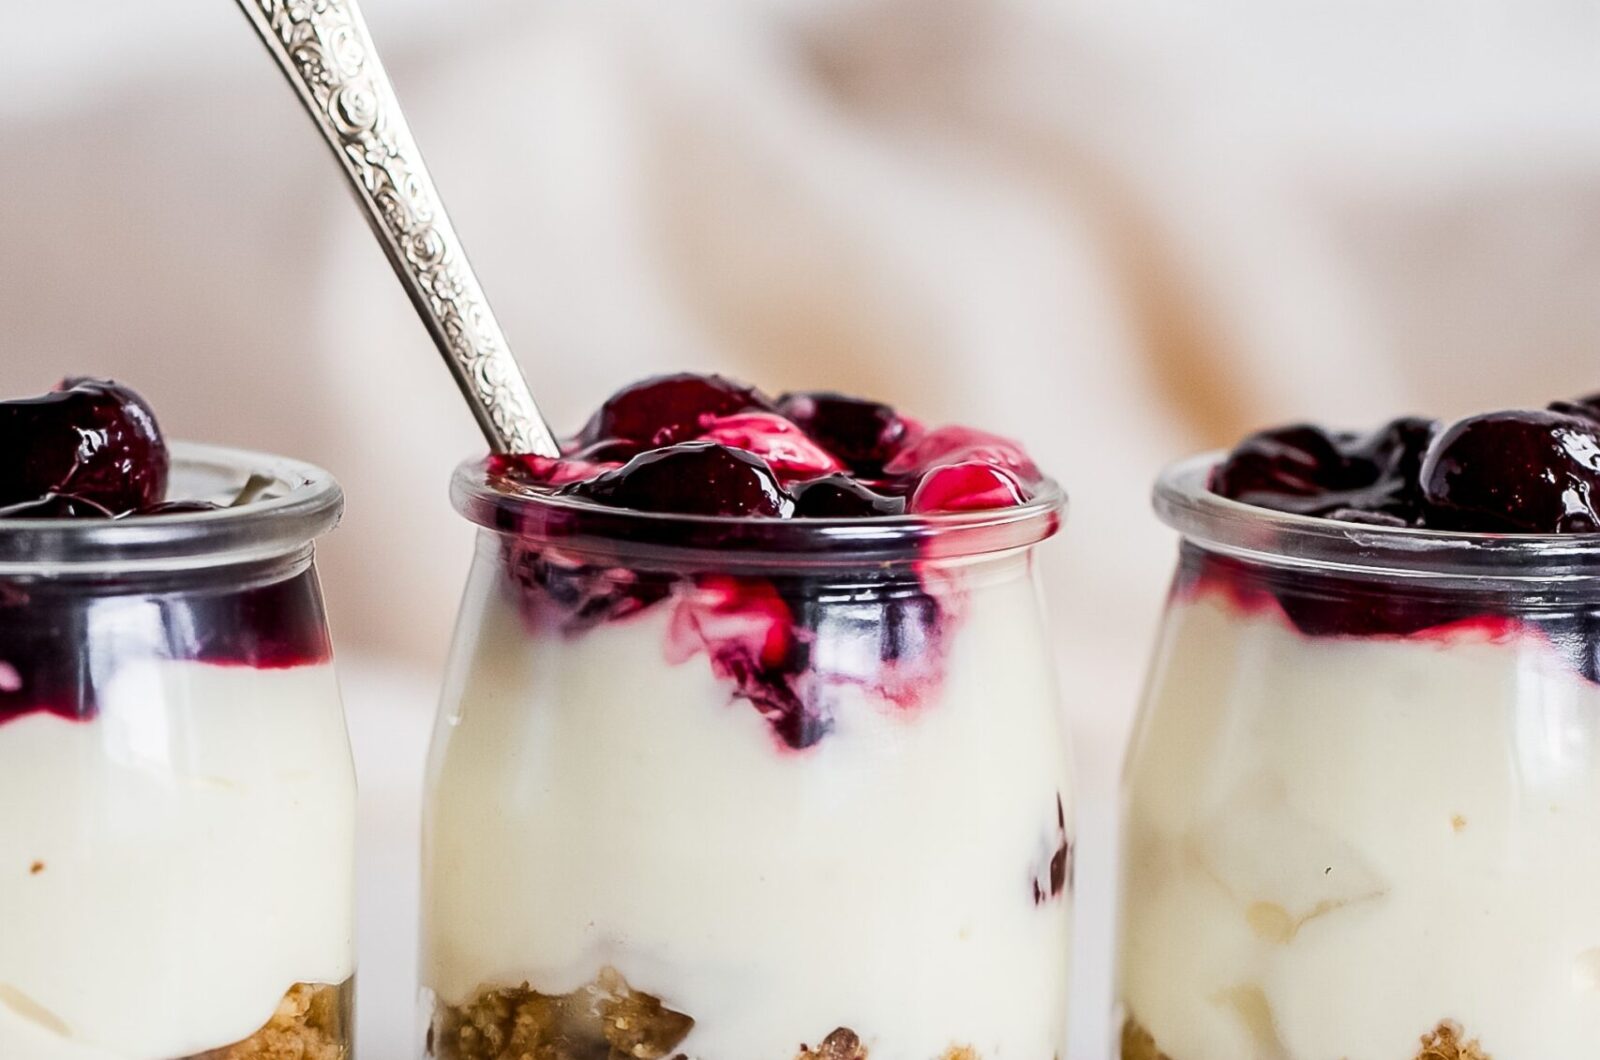
These cheesecake jars are composed of three delicious layers:
- Buttery Graham Cracker Crust: A simple mix of graham cracker crumbs and melted butter that forms the base of the dessert.
- Creamy No-Bake Cheesecake Filling: A smooth and fluffy filling made with cream cheese, sugar, heavy cream, and a hint of lemon and vanilla.
- Toppings of Your Choice: Whether you prefer fresh fruit, chocolate chips, caramel drizzle, or whipped cream, the options are endless!
Ingredients Overview for No-Bake Cheesecake Jars
Graham Cracker Crust:
- Graham Cracker Crumbs: About 1 cup of graham cracker crumbs will create a sturdy and flavorful base. You can swap this with other types of cookie crumbs, like Oreos, for a fun twist.
- Melted Butter: Unsalted butter helps the crumbs stick together and adds a rich flavor.
Cheesecake Filling:
- Heavy Cream: Whipped into stiff peaks, this gives the cheesecake its fluffy, light texture.
- Cream Cheese: Use full-fat brick cream cheese (not the spreadable kind) for the creamiest filling.
- Granulated Sugar: Sweetens the filling to perfection.
- Sour Cream: Adds a slight tang that balances the sweetness and provides that classic cheesecake flavor.
- Vanilla Extract: Enhances the flavor of the filling.
- Lemon Juice: Provides a fresh, bright flavor that cuts through the richness of the cream cheese.
Flavors and Toppings
This is where you can get creative! The base cheesecake filling is a blank canvas that you can easily flavor to suit your preferences. Here are some ideas to inspire you:
- Peanut Butter Cheesecake: Add 1/3 cup creamy peanut butter to the filling for a rich, nutty flavor.
- Nutella Cheesecake: Mix in 1/3 cup of Nutella for a chocolate-hazelnut twist.
- Lemon Cheesecake: Add extra lemon juice and zest for a tangy citrus flavor.
- Chocolate Cheesecake: Stir in 1.5 tablespoons of cocoa powder or use chocolate cookie crumbs for the crust.
- Raspberry Swirl Cheesecake: Incorporate raspberry preserves for a fruity, sweet-tart contrast.
Topping Options: Top your cheesecake jars with any of these delicious choices:
- Fresh fruit like berries or sliced peaches
- A drizzle of caramel or chocolate sauce
- Whipped cream
- Cookie crumbles or chocolate shavings
- Toasted nuts or coconut flakes
Tips & Tricks
- Make It Ahead: You can prepare the jars up to three days in advance. Just store them in the refrigerator until ready to serve. If you need to make them even further ahead, freeze the jars without the toppings and thaw them when needed.
- Use the Right Cream Cheese: Always opt for full-fat brick-style cream cheese for the best texture. Cream cheese spread will not set properly and can result in a runny filling.
- Chill for Best Results: While the cheesecake jars can be served right away, chilling them for 30 minutes to an hour will allow the flavors to meld together and create a firmer, more satisfying texture.
- Personalize Your Jars: Have fun with jar sizes! Use 6-ounce or 8-ounce jars depending on your preference. You can even use clear plastic cups for a more casual setting.
- Make it Portable: These jars are great for picnics or parties. Simply cover the jars with lids and pack them in a cooler until ready to serve.

No-Bake Cheesecake Jars
30
minutesThese no-bake cheesecake jars are a quick and easy dessert made with a buttery graham cracker crust, a creamy cheesecake filling, and customizable toppings. Perfect for parties or a fun treat at home!
Ingredients
2 tablespoons unsalted butter, melted
1 cup graham cracker crumbs
1 cup cold heavy whipping cream
8 ounces full-fat cream cheese, softened
1/3 cup granulated sugar
2 tablespoons sour cream
1 teaspoon lemon juice
1/2 teaspoon vanilla extract
Toppings of choice (fresh fruit, caramel sauce, whipped cream, etc.)

Directions
- Mix melted butter with graham cracker crumbs until the texture resembles wet sand. Spoon about 2 tablespoons into each jar and press down lightly. Set aside
- Using a mixer, whip the cold heavy cream into stiff peaks. Set aside
- Beat the cream cheese, sugar, sour cream, lemon juice, and vanilla extract together until smooth. Gradually fold in the whipped cream.
- Spoon the cheesecake filling over the crust in each jar. Leave room for toppings. Chill the jars for at least 30 minutes or serve immediately.
- Add your favorite toppings before serving. Enjoy
Notes
- Leftover jars can be stored in the refrigerator for up to five days. For longer storage, freeze without the toppings for up to three months.
- For a fancier presentation, garnish the top of each jar with a small mint leaf or a dusting of powdered sugar.
- Store leftovers in the refrigerator for up to 5 days or freeze for up to 3 months.